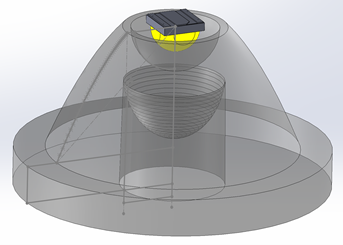
Intermediate Tutorial: UVC Disinfection Chamber
This tutorial will demonstrate how compute irradiance for a UVC based disinfection chamber.
Skill Level
Intermediate
Downloads
none

1. Open Project
Open SOLIDWORKS.
Open the TIR Collimator assembly from the “TIR Collimator Lens Design” tutorial (or use any already running Photopia assembly).
Set your assembly units to Metric (MMGS).
Save the Assembly.
2. Add a Laser Lamp
Choose “Add Lamp” from the Photopia CommandManager tab.
Click "Browse Lamps".
Type "laser" in the search bar.
Double click on the "Laser 0.1mm Diameter, 0.01deg Spread" lamp.
Click OK to insert the lamp at the assembly origin.
Select the lamp.
Click Move Component in the Assembly CommandManager.
Change the move style to "By Delta XYZ".
Move the lamp by -1.5mm in the Z direction.
Click OK to accept the new position.

Tip : Ray Fan Lamp Models
We now have some custom lamp models that are a fan of rays, so you won't need to do the patterning that this tutorial shows. Search for RAYFAN to find these new lamp models.
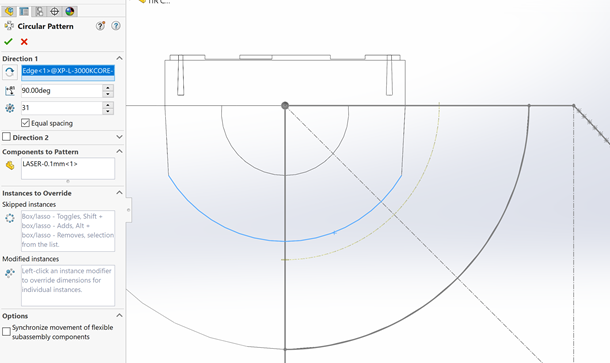
3. Pattern the Laser
Select the laser.
Click on "Circular Component Pattern" in the Assembly CommandManager.
For Direction 1 choose the front arc edge of the LED (shown in blue to the right).
For Angular Sweep enter 90deg.
For the Count enter 31, to add a laser every 3deg.
Check the Equal Spacing box.
Click OK to create the laser pattern.
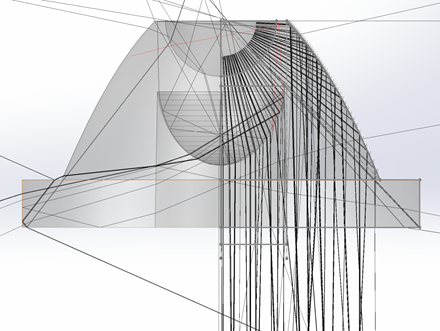
4. Run the raytrace
Suppress the XP-L-3000K to only see the laser rays in the results.
Click Raytrace Settings in the Photopia CommandManager.
For Sample Ray Count enter 250.
For Sample Ray Length enter 50mm.
Click OK to accept these settings.
Click Run Raytrace.
Click Show/Hide Rays in the Photopia CommandManager to dispally the 3D Rays.
5. Next Steps
You can adjust the PODT features to ensure all of the rays are aiming in the best direction, then suppress the rays and re-run with the LED to see your final distribution.